> ## Documentation Index
> Fetch the complete documentation index at: https://asapp-04-04-getting-started-ga.mintlify.site/llms.txt
> Use this file to discover all available pages before exploring further.
# Links
> Learn how to manage external links and URLs that direct customers to web pages.
ASAPP provides a powerful mechanism to manage external links and URLs that direct customers to web pages. Links are predominantly used in flows, core dialogs, and customer profiles.
## Links List
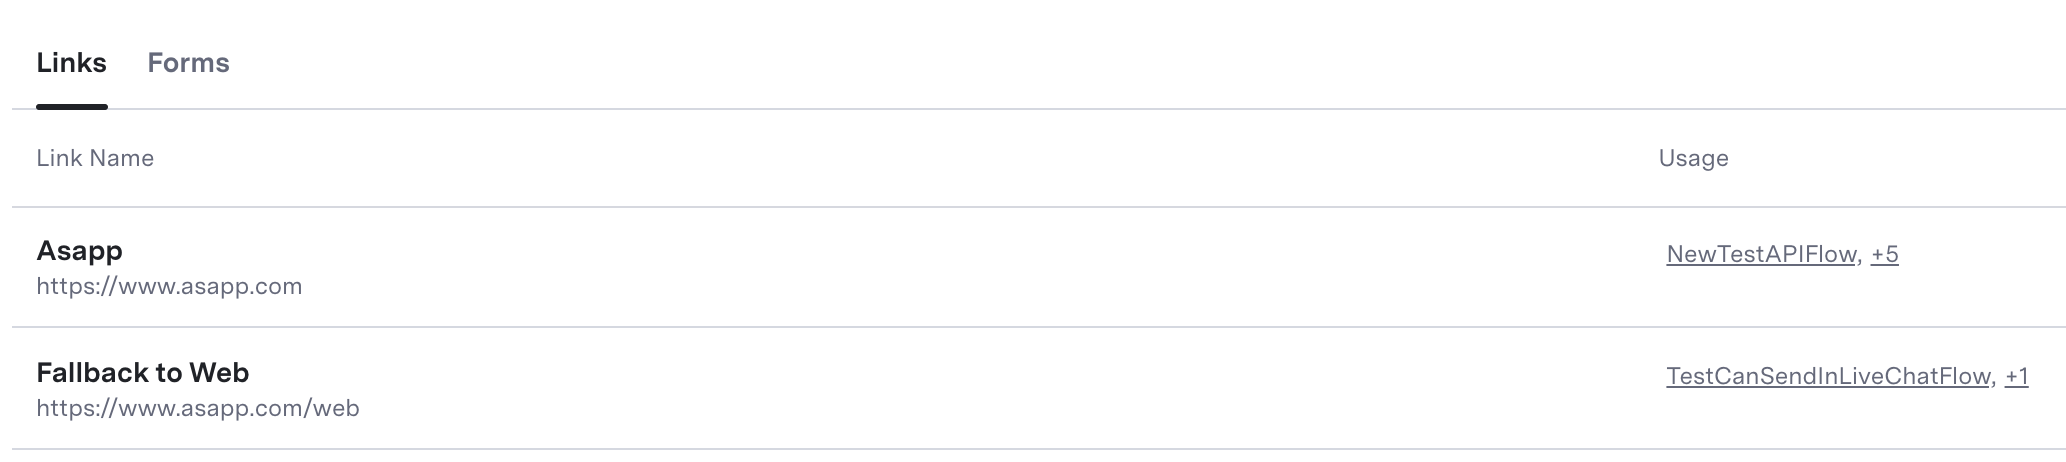
The Links list page displays a list of all links available to use in AI-Console. When a link is created, it can be attached to content in a node in Flow Tooling, included in the Customer Profile panels, assigned to a View, etc.
Here, you'll find the **Link name & URL**. When adding a link to a flow or other feature, you will be required to add it from a list of all link names.
 ## Create a Link
To create a link:
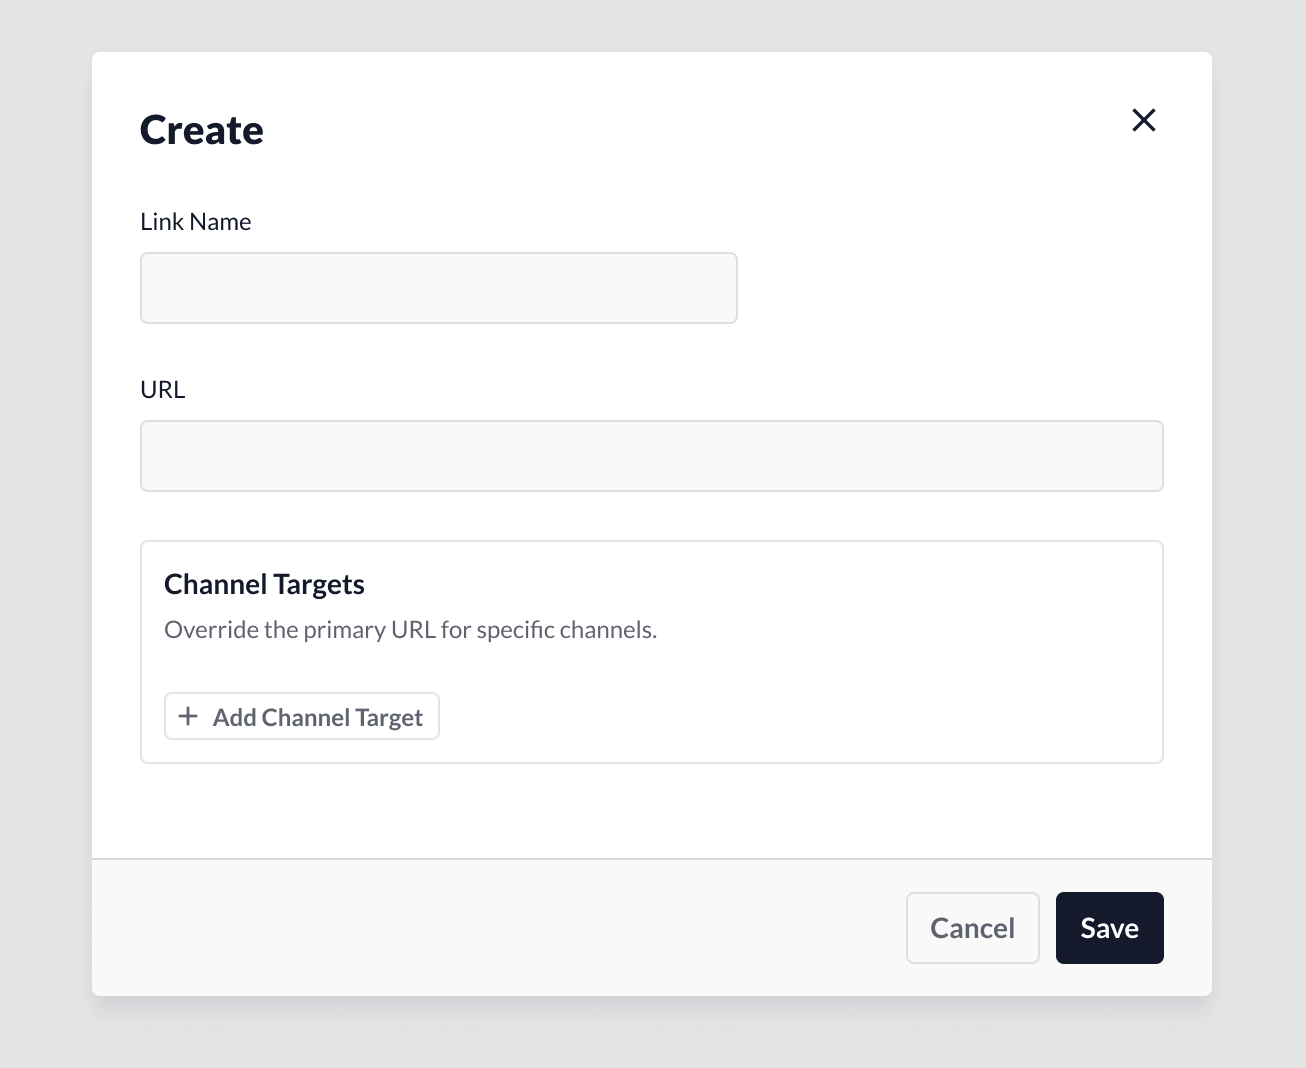
1. From the **Links** landing page, click the **+** button at the bottom right.
2. A modal window will open.
3. **Link name:** Provide a name for the link. Make the name descriptive so that other users can recognize its purpose.
4. **URL:** Include the full external URL, including **http\://** (e.g., `http://example.com/about`).
5. **Channel Targets:** This feature is optional. It allows users to create a link variant that targets customers using a specific channel. See details below.
## Create a Link
To create a link:
1. From the **Links** landing page, click the **+** button at the bottom right.
2. A modal window will open.
3. **Link name:** Provide a name for the link. Make the name descriptive so that other users can recognize its purpose.
4. **URL:** Include the full external URL, including **http\://** (e.g., `http://example.com/about`).
5. **Channel Targets:** This feature is optional. It allows users to create a link variant that targets customers using a specific channel. See details below.
 ### Add a Channel Target Variant
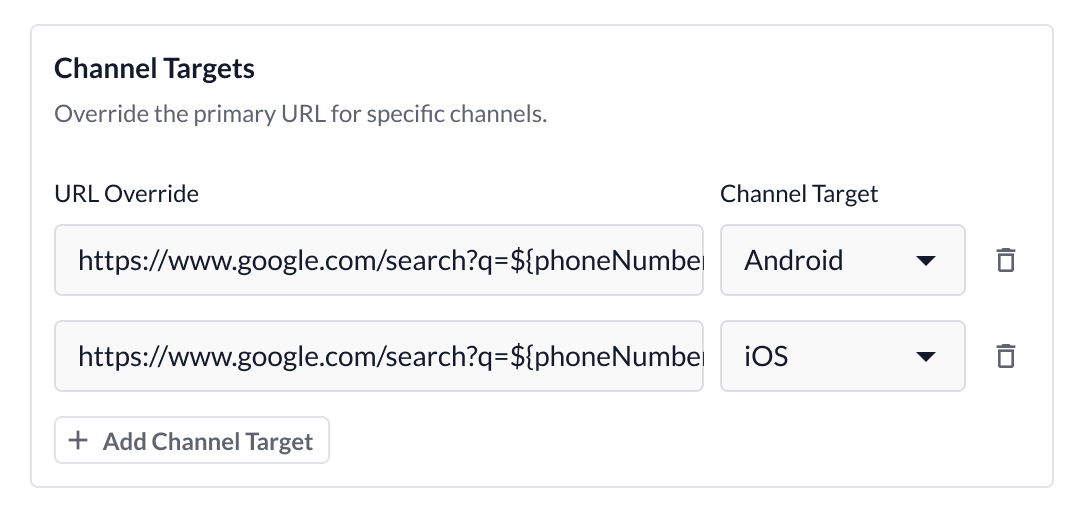
1. Click **Add Channel Target** to add a URL variant. A new input field will be added.
a. **URL Override:** Include the URL variant for the targeted channel. Please follow the same URL syntax as described under **Create a Link**.
b. **Channel Target:** From the drop-down menu, select which channel to target. Bear in mind that a single variant per channel is currently supported.
2. **Delete targets:** To remove a target, click the **Delete** icon.
3. **Save:** To save the link, click the **Save** button. The link will not be active until it is assigned to a flow, customer profile or any other feature that supports **Links**.
4. **Cancel:** On click, all changes will be cleared.
### Add a Channel Target Variant
1. Click **Add Channel Target** to add a URL variant. A new input field will be added.
a. **URL Override:** Include the URL variant for the targeted channel. Please follow the same URL syntax as described under **Create a Link**.
b. **Channel Target:** From the drop-down menu, select which channel to target. Bear in mind that a single variant per channel is currently supported.
2. **Delete targets:** To remove a target, click the **Delete** icon.
3. **Save:** To save the link, click the **Save** button. The link will not be active until it is assigned to a flow, customer profile or any other feature that supports **Links**.
4. **Cancel:** On click, all changes will be cleared.
 ### Link Assignments
Once a link has been created, it can be sent to customers in flows. The **Links** feature will keep tabs on where each link has been assigned and provide quick access to those feature areas.
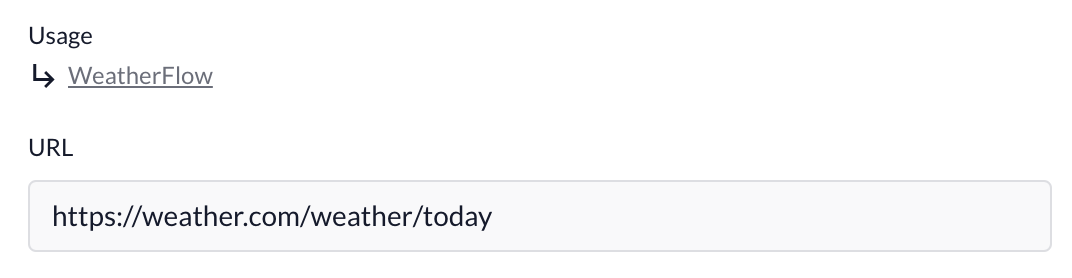
When viewing a specific link, the Usage section indicates which flows are currently using the respective link. On click, you can navigate directly to the flow. When a link is not assigned in any flow, 'Not yet assigned' will be displayed.
### Link Assignments
Once a link has been created, it can be sent to customers in flows. The **Links** feature will keep tabs on where each link has been assigned and provide quick access to those feature areas.
When viewing a specific link, the Usage section indicates which flows are currently using the respective link. On click, you can navigate directly to the flow. When a link is not assigned in any flow, 'Not yet assigned' will be displayed.
 ## Edit a Link
Link changes are global, which means that saved changes are immediately pushed to all features that reference the link.
1. From the **Links** landing page, click the **link name** you want to edit.
2. **Link ID:** After a link is saved for the first time, a unique identifier is automatically assigned to the link. This identifier does not change over time, including when the link is edited.
a. The **Link ID** can be referenced in **Historical Reporting** for your reporting needs.
3. Assign changes to the configurations.
4. **Save:** When changes are complete, click **Save** to automatically apply the changes.
## Delete a Link
Links can be deleted, but only if they are not currently assigned. To delete a link that is assigned, remove the assignments first.
## Edit a Link
Link changes are global, which means that saved changes are immediately pushed to all features that reference the link.
1. From the **Links** landing page, click the **link name** you want to edit.
2. **Link ID:** After a link is saved for the first time, a unique identifier is automatically assigned to the link. This identifier does not change over time, including when the link is edited.
a. The **Link ID** can be referenced in **Historical Reporting** for your reporting needs.
3. Assign changes to the configurations.
4. **Save:** When changes are complete, click **Save** to automatically apply the changes.
## Delete a Link
Links can be deleted, but only if they are not currently assigned. To delete a link that is assigned, remove the assignments first.
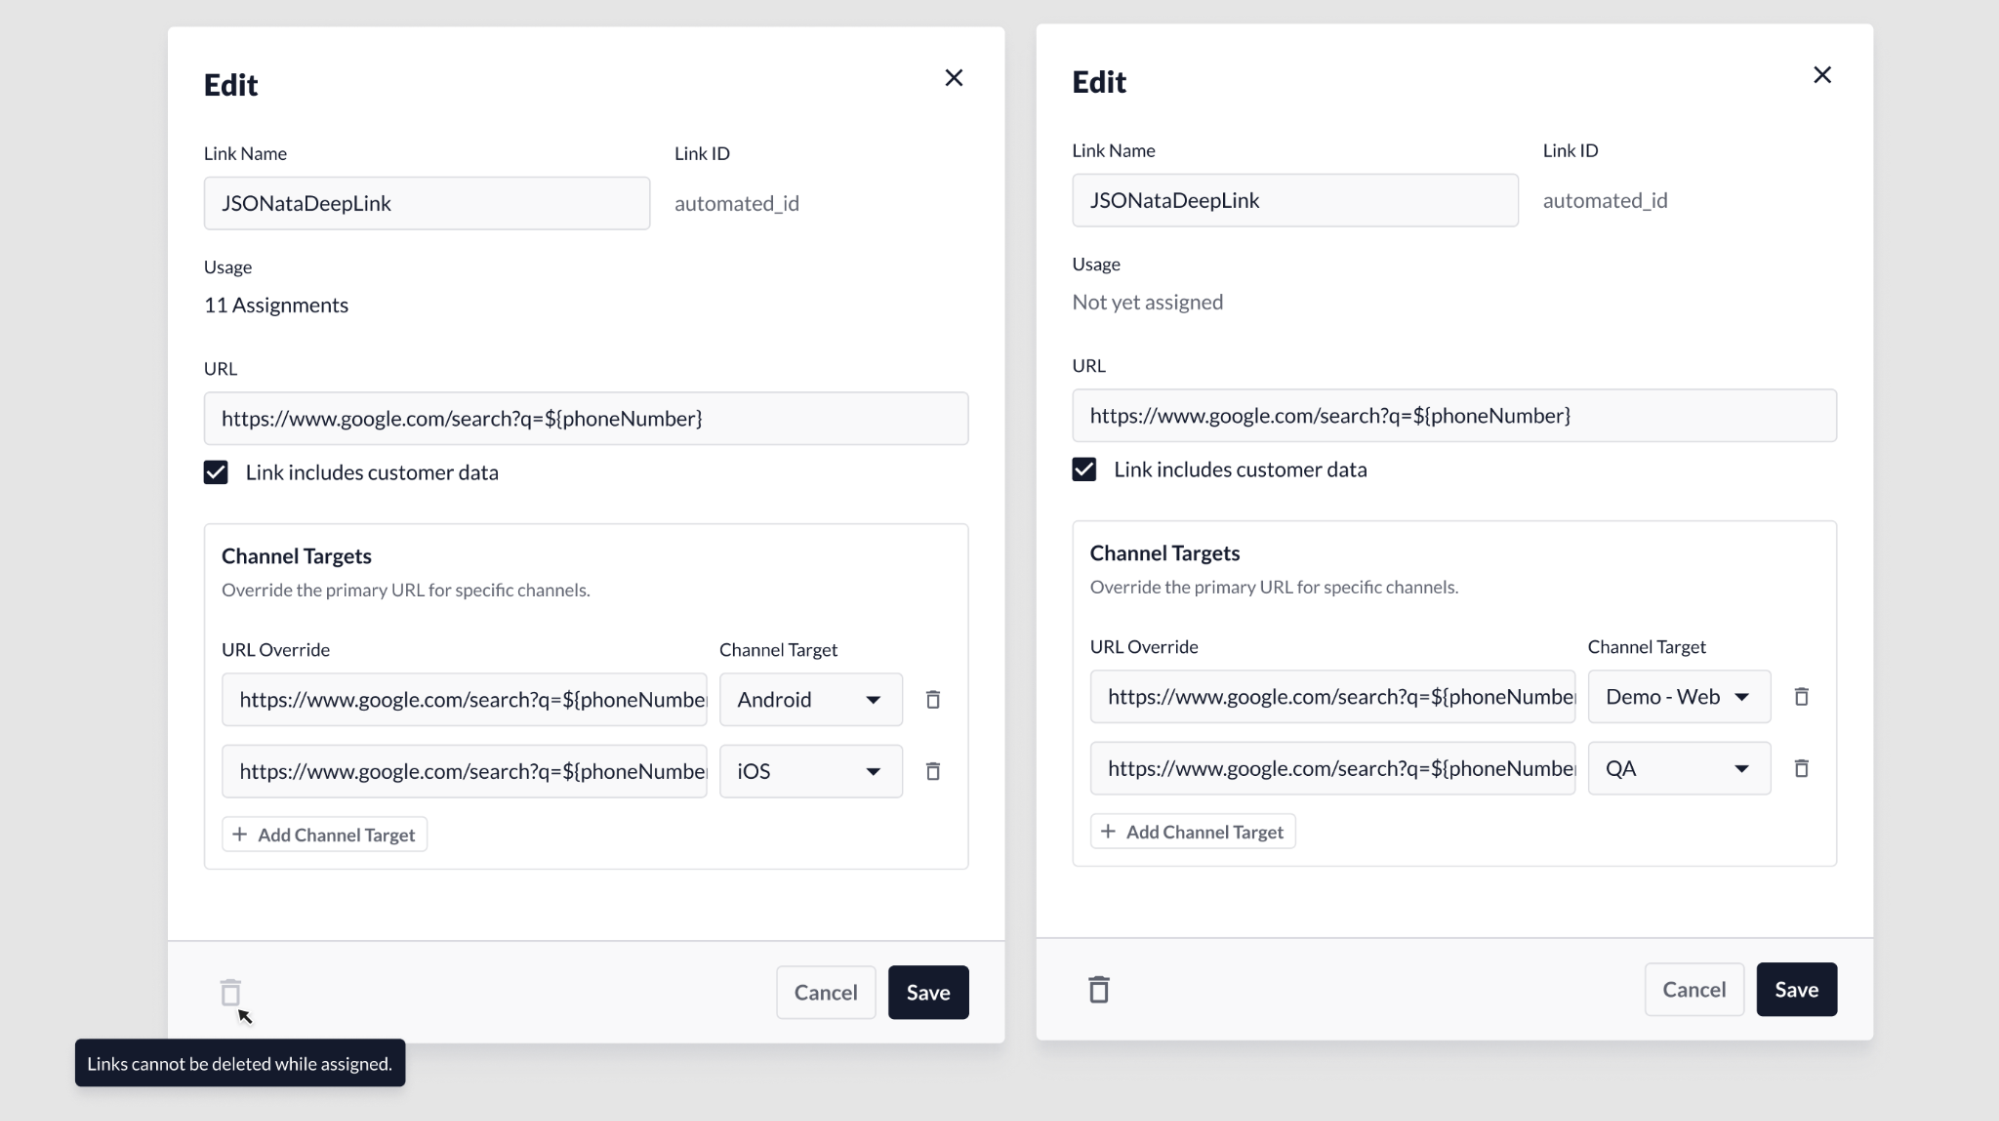 1. If the link is assigned: When opening the Link modal, the **Delete** button will be disabled. The delete function will remain disabled until all link assignments have been removed.
2. If the link is not assigned: The link can be deleted by clicking on the **Delete** button on the bottom-left area of the link modal.
1. If the link is assigned: When opening the Link modal, the **Delete** button will be disabled. The delete function will remain disabled until all link assignments have been removed.
2. If the link is not assigned: The link can be deleted by clicking on the **Delete** button on the bottom-left area of the link modal.